
The Ultimate Guide To Take You From Hello To Home Screen
Hello Friends, and welcome to your new iOS or iPadOS device! Today, we’ll be going over how to get your device set up. If it’s your first Apple device, welcome to the club! We’re thrilled to have you on board. I know it can be a bit intimidating to learn a new product, but never fear! I am here to guide you through each step of the setup process and make sure you can hop right into using your new device.
I created this tutorial using an iPad Pro, but most of the settings and options will be the same no matter your product. For reference, we’ll be working with iOS 15. This version of iOS and iPadOS was released in September 2021; so if you’re going through this tutorial at a later time, some things may be a little different. I’ll keep this updated as changes happen, so make sure you check for edits and updates.
If you need any clarification, or just want to say “hi”, please leave it in the comments below! Don’t forget to like this video if you found it helpful, and subscribe for more tech tips!
Turn On Your Device
Before you can set up a new iPhone, iPad or iPod touch, you’ll need to turn the device on.
For iPhone X, XR, XS, XS Max, 11, 11 Pro, 11 Pro Max, 12, 12 mini, 12 Pro, 12 Pro Max, 13, 13 mini, 13 Pro, and 13 Pro Max:
Press and hold the side button until you start to see the screen light up. You can let go of the button when you see the screen turn on.
For iPhone 6, 6 Plus, 6s, 6s Plus, 7, 7 Plus, 8, 8 Plus and SE (2nd Generation):
Press and hold the side button until you start to see the screen light up. You can let go of the button when you see the screen turn on.
For iPhone 2G, 3G, 3GS, 4, 4S, 5, 5S, 5C, SE (1st Generation) and iPod touch:
Press and hold the top button until you start to see the screen light up. You can let go of the button when you see the screen turn on.
For iPad 1, 2, 3, 4, 5, 6, 7, 8, 9, Mini, Air, and Pro:
With the device in portrait mode, press and hold the top button until you start to see the screen light up. You can let go of the button when you see the screen turn on.
After your device turns on, you will be presented with the word “hello” flashing on the screen in multiple languages.
Go through the Setup Assistant
Alrighty! You’ve gotten your device turned on and been greeted in multiple languages. Depending on your device, you’ll be prompted to either press the home button or swipe up to get started. If your device has a home button, it’ll be located near the bottom center of the device. This will be just above the charging port where you plug the device in.
If your device is all screen, you’ll see a bar near the bottom center of the screen. Place your finger on the bar and swipe up to reveal the next screen.
Provide Some Basic Information
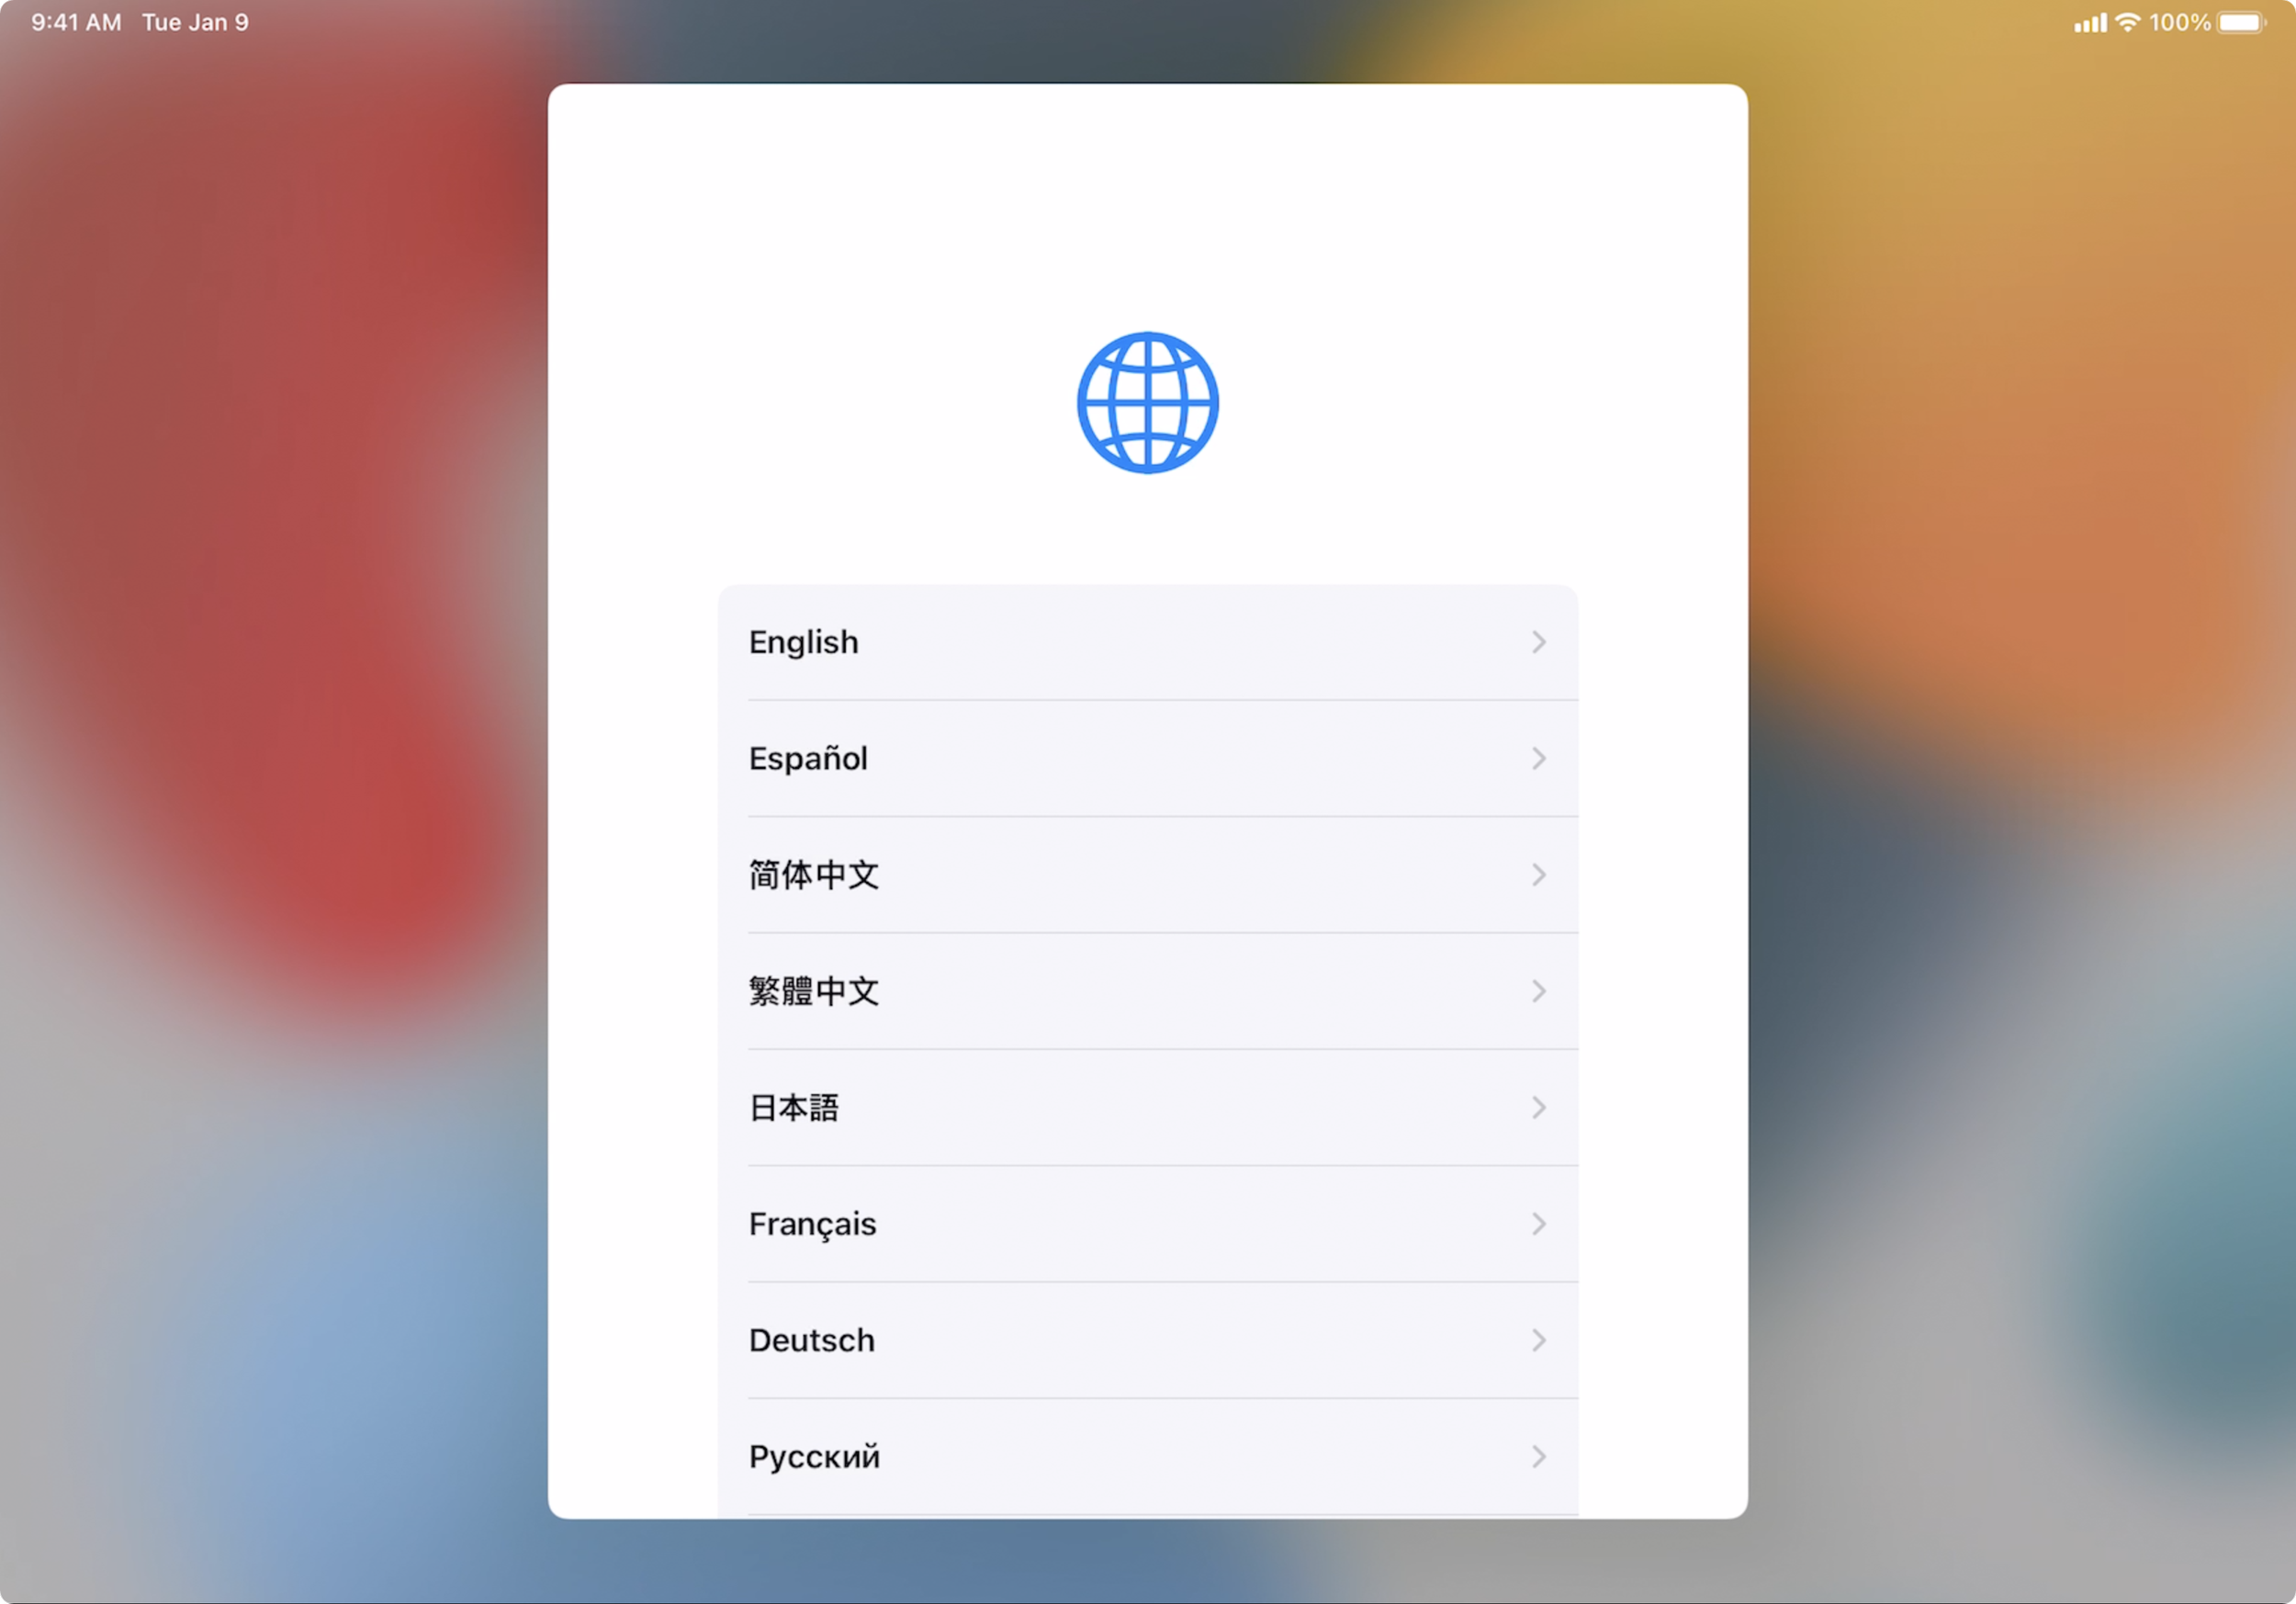
On the first screen, you’ll be prompted to select your language. Choose the language you’re most comfortable with. Your selection will be the language used for the remainder of the setup. This will also be the language used on your device as your primary language. Language preferences can be changed later in Settings if you need to switch this at a later time.
Next, select your country or region. Choose the area that you currently live in. Not all features and settings are available worldwide, so selecting the correct geographic area is important. If you make a mistake or relocate, you can change this option later in Settings.
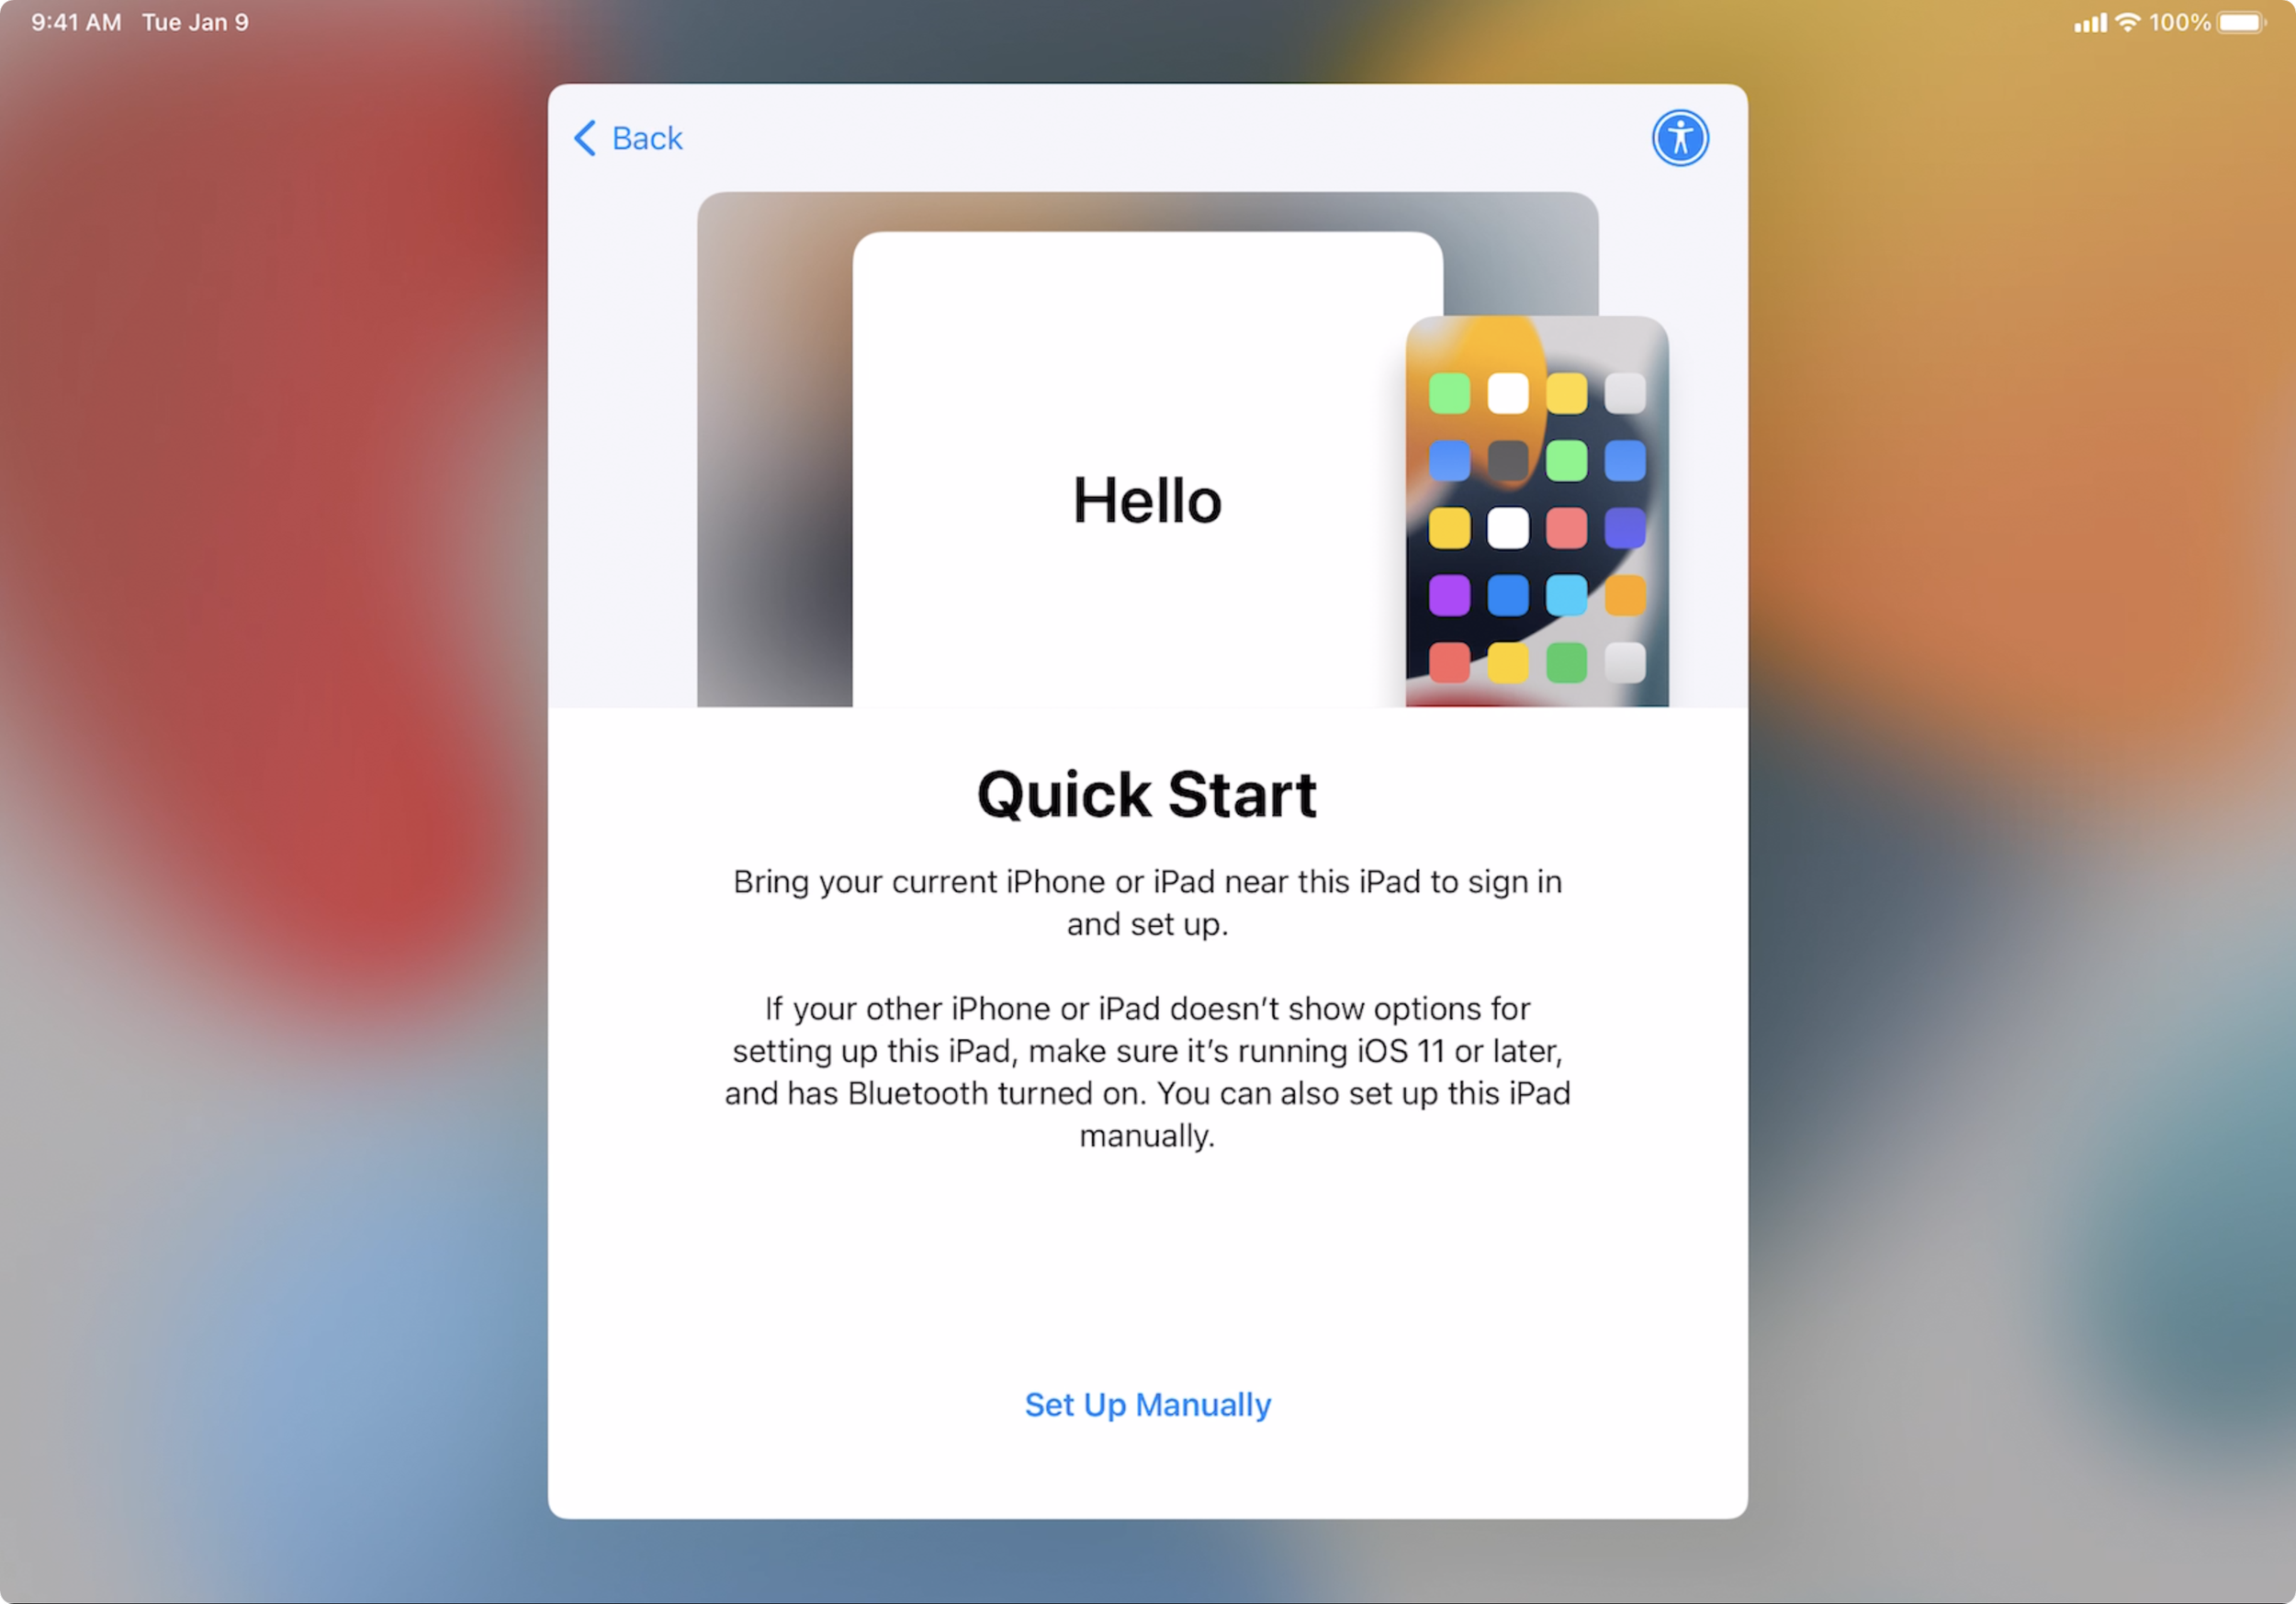
Finally, you’ll be asked if you want to set this device up using QuickStart or if you’d like to configure your device manually. Quick Start is great if you have another Apple device that you’d like to copy the information from. If you decide to use Quick Start, both your new device and your old device will need to power on. The old device will need to be signed in on your Apple ID, and you’ll need to enter the passcode used to unlock that device. Here’s a link to Apple’s guide on using Quick Start in the description box below.
If you don’t have another iPhone, iPad, or iPod touch to transfer your data from, you’ll want to select the option to set up manually. Setting the device up manually will still give you the option to transfer your data from either iCloud, a computer or an Android device.
Personalize Your Device
If you selected the option for QuickStart, your data is in the process of syncing over. If you’d like me to make a more detailed guide on how to use the QuickStart feature, just let me know in the comments.
After following the on-screen steps to configure QuickStart, skip to Step 5 in this tutorial.
Everyone who selected the option to set up the device manually has some additional options to configure. You’ll be asked to enter the information for your Wi-Fi network. Connecting to a wireless network is optional, but if you’re transferring your data from iCloud or Android, you’ll need to have a reliable WI-FI connection. If you prefer not to set up WI-FI, you can select the option to “Choose another network” and stick with cellular data if you’re on a device that supports that. Many people don’t have an unlimited cellular plan with their carrier, so make sure you understand how your data rate and billing before setting up your device using cellular data.
After establishing an internet connection on either WI-FI or cellular, your device will activate. You’ll see a message that says, “It may take a few minutes to activate your device.” This screen can take a little longer than the others depending on how fast your internet is, and what device you are activating. After activation, you’ll be presented with some information on how your private data is collected, managed, and stored. You can choose to continue after reading the information or use the link at the bottom of the screen to learn more about privacy and your data.
Depending on what device you have, you’ll get the option to set up FaceID or TouchID. If you have an older device or an iPod touch, your device might not include the necessary parts to set up FaceID or TouchID. If your device doesn’t have the required hardware, you won’t see those options.
If you decide to use FaceID or TouchID, just follow the on-screen prompts to set up your face or fingerprint. For FaceID, you’ll place your face within the viewfinder of the front camera and slowly rotate your head. The device will scan the data and let you know when you’re able to proceed. Setting up TouchID is very similar. You’ll place your finger gently on the home button. You’ll be prompted to place and lift your finger multiple times so that the device can get a good reading. Just let me know if you’d like a tutorial on how to set these up and why using TouchID or FaceID can be useful.
After setting up FaceID or TouchID, you’ll be prompted to create a passcode. Creating a passcode is not optional if you’re using TouchID or FaceID, so if you prefer not to have a passcode, then make sure you don’t set up FaceID or TouchID. By default, you’ll see the option to create a 6 digit passcode. Tap on “Passcode Options” if you’d like to select a different type of passcode for your device.
You can choose from:
-
A Custom Alphanumeric Passcode: these are passcodes that include a combination of letters and numbers. The letters can be capital or lowercase, and there is no maximum length.
-
A Custom Numeric Passcode: This passcode consists of numbers only. It can be any length of numbers.
-
A 4-Digit Passcode: This passcode consists of only 4 numbers.
-
Don’t Use A Passcode: This option allows the device to open and perform tasks without prompting you for a passcode.
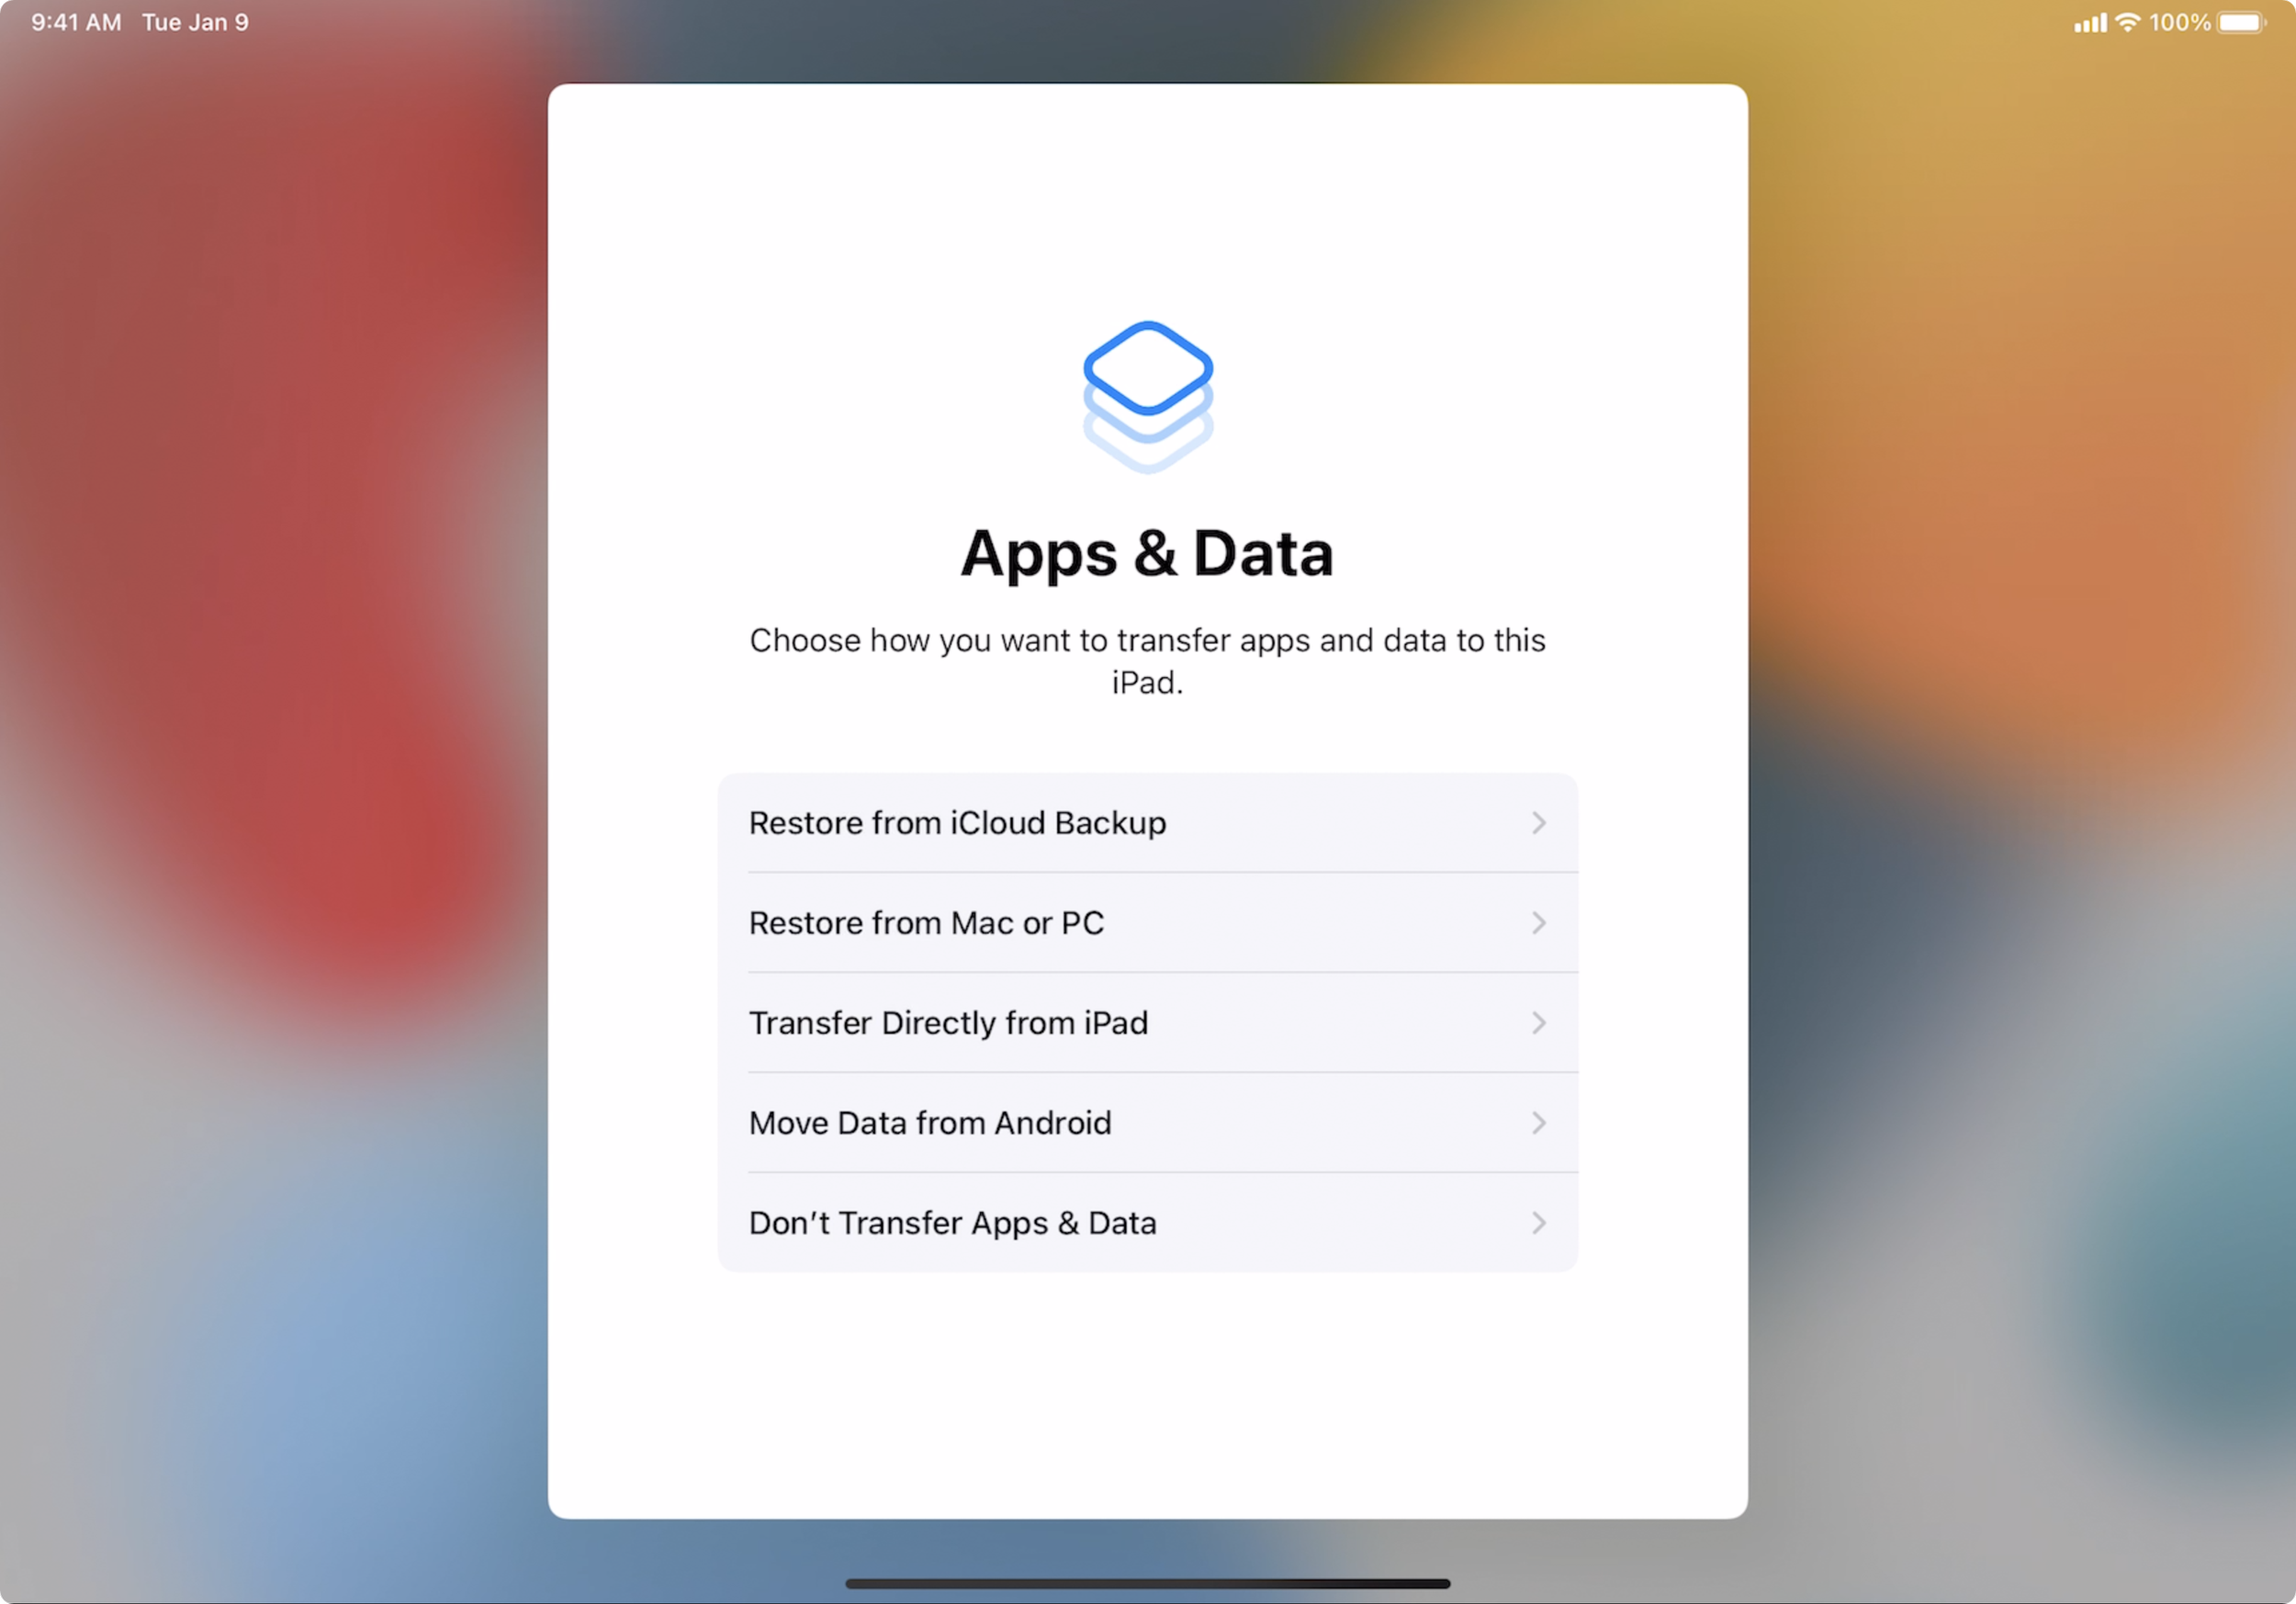
After selecting and setting up your passcode options, you’ll move to the Apps & Data section. On this page, you’re presented with options for getting data moved over to your new device.
You can choose to move the data via an iCloud Backup, from your computer, directly from another iOS or iPadOS device or from an Android device. Let’s talk about each of those options, so you can choose the best way to move your content and information to your new device.
Option 1: Restore From iCloud Backup
If you’ve had an iPhone, iPad, or iPod touch in the past, you can use this option to restore the data from that device via iCloud. You would need to have previously used iCloud to store a copy and backup the information on that device. If you’re not certain that you made an iCloud backup, the next screen allows you to sign in with your Apple ID account. From there, you’ll see any backups stored in your iCloud account. Here’s a link in the description to the type of information included in an iCloud backup.
Option 2: Restore From Mac or PC
If you’ve had an iPhone, iPad, or iPod touch in the past, you can use this option to restore the data from that device via a local backup stored on your Mac or PC. To restore from your computer, you’ll need to have previously connected an iPhone, iPad, or iPod touch to your computer and performed a backup. For a backup to the computer; iTunes and a physical connection between your device and the computer is required. Connecting to your computer is usually faster if you have a lot of data to restore. If you perform an encrypted backup of your old device, you can restore information such as WI-FI passwords and app log in information. Here’s a link to some information on iTunes and encrypted backups.
Option 3: Transfer Directly From Device
An option that a lot of people aren’t aware of is the device-to-device transfer. The process is fairly simple in theory: use a cable to connect two iOS or iPadOS devices together. The process gets a little complicated when you consider what cables you’ll actually need to accomplish this task. Let’s say you want to connect two iPhones together. You’ll need a lightning cable that connects to one iPhone, but you’ll need either lightning to USB-A or lightning to USB-C adapter. Most people aren’t walking around with that special type of adapter, so you’d need to purchase one. The same would go for connecting an older iPad to one of the newer iPads. If you’ve already got that cable that comes with a new iPhone (11 or newer), awesome! You’re all set! But if you don’t have one of those, then we’re back where we started, and you’ll have to buy something to make the transfer.
Device-to-device transfer can be fast, but if you don’t have the cables and adapters you need, it will not be a great option. These Apple products can get expensive, so we don’t necessarily want to run out and spend more money just to get our data transferred. If you’d like to experiment, I’ll leave some links in the description for the various cables and adapters you’ll need to accomplish this. Furthermore, let me know in the comments if you’d like a full tutorial on how the device-to-device transfer works.
Option 4: Move Data From Android
Yes, my friends, you’re not slowly losing your mind. You can indeed move your data from your existing Android device. The process is fairly simple. You’ll download the Move to iOS app via Google Play. From there, you’ll follow the on-screen prompts and select the data you’d like the transfer. There will be a code on your new Apple device that you’ll input on the app. After inputting the code, your data will start transferring. Check out this link with additional instructions in the description.
Option 5: Don’t Transfer Apps & Data
The easiest of all the options is to not transfer apps and data. If this is your first smart device, or if you’d like a clean slate, this is the option for you! If you want to transfer basic information to your device such as calendars, contacts, emails etc. you can always sync those by signing in with your Apple ID or email provider.
Sign In And Continue Customizing
The next screen will prompt you to sign in with your Apple ID. If you don’t have an Apple ID account or if you’ve forgotten what it is, you’ll see options for that too. Just tap on “Forgot password or don’t have an Apple ID?”. You’ll get the options to look up your Apple ID information, or create a brand new Apple ID account.
You’ll see three options on this screen:
-
Forgot Password or Apple ID
-
Create a Free Apple ID
-
Set Up Later in Settings
If you prefer not to sign in right away, use the option to set up later in settings.
If you decided to sign in with your Apple ID, you’ll be prompted to enter your email address and password. Most Apple ID accounts use Two-Factor Authentication. This is where you’ll need to receive a verification code to sign in with your Apple ID. This code delivers via text message or as an on-screen notification. If you didn’t receive the notification, just tap on “Didn’t get a code?”, and you’ll see additional options for receiving the verification code.
If you don’t use Two-Factor Authentication for your Apple ID, you won’t be prompted to enter a code.
On the next several screens, you’ll be presented with options to further customize your device. Let’s go through each page together. I’ll explain the available options. If you have unanswered questions from this section, please leave a comment below, and I’ll respond to your questions!
Make This Your New Device
If you’ve previously had an iOS or iPadOS device, you’ll have the option to use the settings from your previous device if you have one. This one will make the process a bit quicker since you won’t have to select each option.
Keep Your Device Up to Date
Get the latest features, security, and improvements by updating iOS automatically. You will receive a notification before updates install, and you can choose other options in Settings.
You can choose to keep your device on the latest version of the software automatically by enabling automatic updates. Your device will download and install the updates when it’s connected to WI-FI, locked, and has enough power. These updates usually happen at night when your device is plugged in.
If you don’t consistently have WI-FI, or you’d just prefer to update manually, then leave the automatic updates off. You can always go into Settings and update to the latest version of the software at any time.
Location Services
Location Services allows Maps and other apps and services like Find My Device to gather and use data indicating your approximate location.
There are several apps that use your location to provide relevant information. You will be able to edit the permissions for each app in Settings. Before an app uses your location, the app will ask your permission. You can also turn location services on or off in Settings if you change your mind later.
Apple Pay
Add cards to Apple Pay to send money to friends and make secure payments in apps and on the web.
Apple Pay works a lot like Zelle, CashApp, Venmo, PayPal etc. You can use Apple Pay for in store payments where Apple Pay is accepted, person to person payments, and on websites that accept Apple Pay. If you’ve got a supported credit or debit card, you can add that here if you’d like. You can also set up Apple Pay later in Settings.
iCloud Keychain
Keep the passwords and credit card information you save secure and up-to-date on the devices you approve. The information in your keychain is encrypted and cannot be read by Apple.
If you frequently type in email addresses and passwords; iCloud Keychain can help. The iCloud Keychain will securely store your website and app logins, so you don’t have to type them in each time you visit the app or website. When you set up Keychain, your information can be automatically filled in. You’ll be prompted to use FaceID, TouchID or your passcode to authenticate. If you use a different password manager or if you just don’t want to store this information via iCloud, you can skip this step.
Siri
Siri helps you get things done just by asking. Siri can even make suggestions before you ask in apps, keyboards. To use Siri, press and hold the top or side button or say “Hey Siri” anytime.
Think of Siri as a virtual, personal assistant. Siri can perform a variety of tasks such as looking up information, scheduling events, running automations and managing your device. You’ll get the option here to configure the settings for Siri, or you can configure these options later.
Screen Time
Get a weekly report with insights about your screen time and set time limits for apps you want to manage. You can also use Screen Time on children’s devices and set up parental controls.
If you’ve ever been curious about just how much time you’re spending on your device; Screen Time will provide you with answers. In addition to receiving insights on how you use your device, you can also set up time limits and restrictions based on app categories and usage. The Screen Time feature can be very helpful if you want to add restrictions for yourself or another user. You can set some options on this screen, or decide how you’d like to configure Screen Time later in Settings.
Device Analytics
Help Apple improve its products and services by allowing analytics of usage data from your iPad. You can change your decision later in Settings. All data is collected using privacy preserving techniques such as differential privacy and is not associated with you or your account.
Sharing your device analytics is a very personal choice. If you decide to share this information, the data can be used to improve future products and features. There’s an option here to learn more about that data and how it’s shared. Its great information if you’re interested in gaining a better understanding of how this all works.
Appearance
You can decide if you’d like your device to display information in light mode or dark mode. This can be changed pretty easily in Settings, so just pick which everyone looks best for you at the time.
Welcome To Your New Device!
After selecting your appearance options, you’ll be welcomed to your new device! How exciting! You can tap continue, and you’ll be taken directly to your Home Screen, where you can jump right into using your favorite apps and customizing your device further.
Thank you so much for joining me as we take the exciting journey of setting up our new devices.
If there’s something specific you’d like to know about setting up your device, please leave me a comment below! I’m happy to answer questions and provide additional resources.
Have a great day, and I’ll see you in the next tutorial!